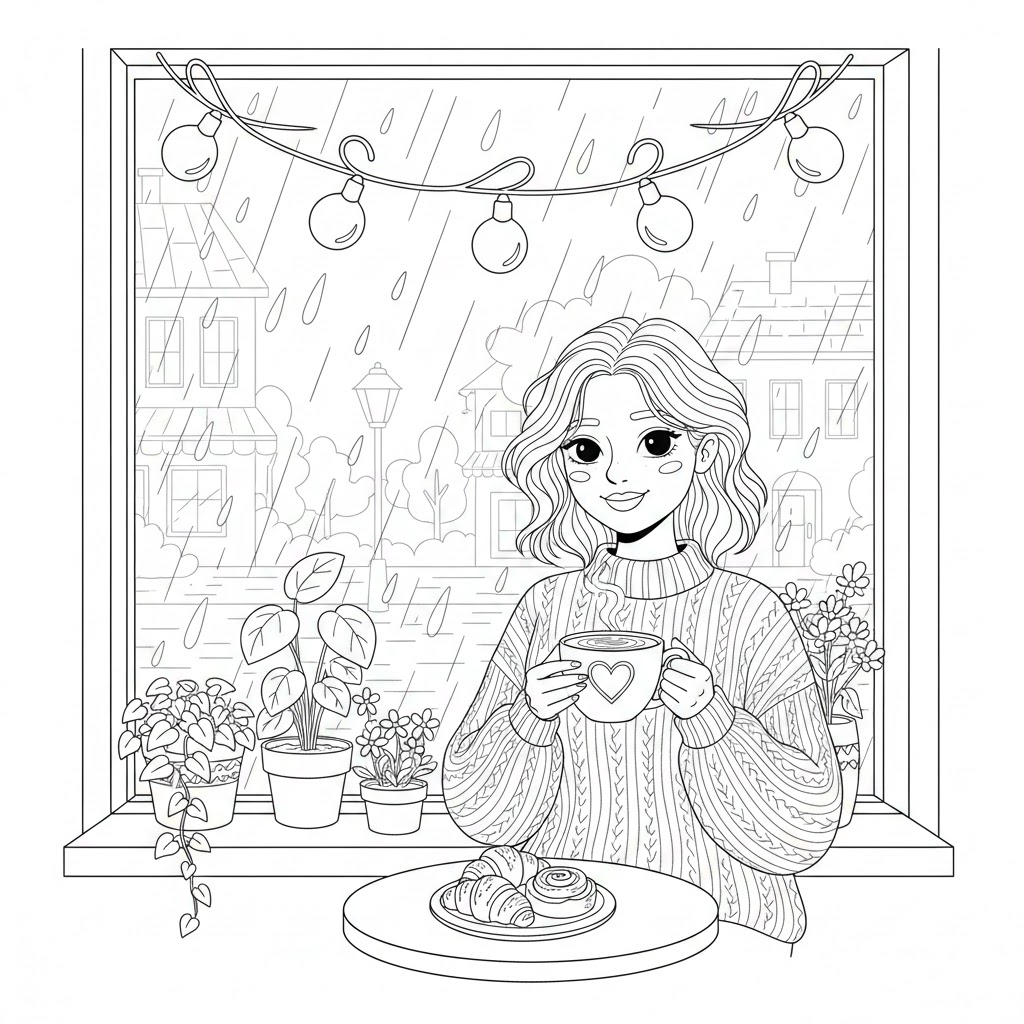
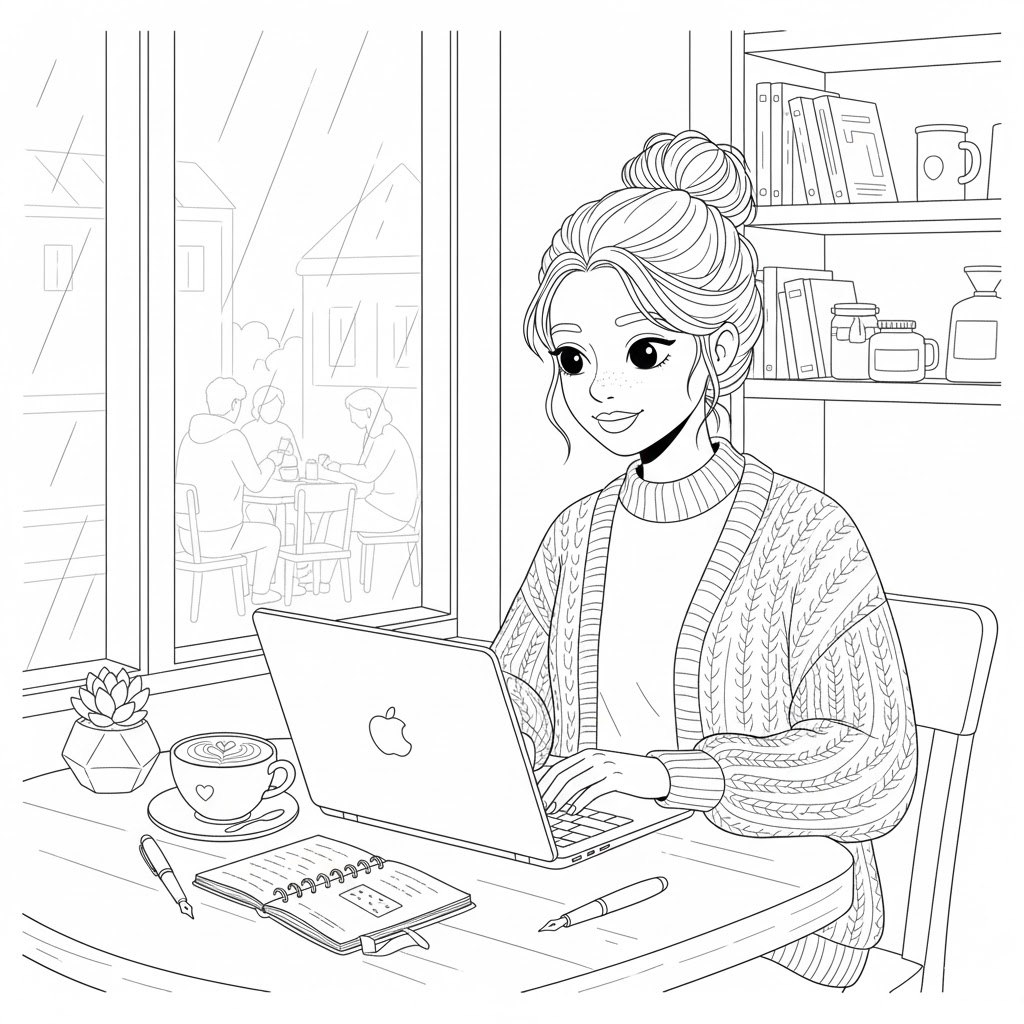
There is a unique magic found in rainy days. While the world outside is washed in greys and blues, our internal world often seeks out warmth, comfort, and creativity. This coloring page captures that “hygge” moment perfectly—a girl, her coffee, a plate of fresh pastries, and the rhythmic pitter-patter of rain against a windowpane.
Whether you are a seasoned artist or someone picking up a crayon for the first time in years, this page offers a wonderful opportunity to play with light, texture, and mood.
1. Setting the Mood: Choosing Your Palette
Before you touch the paper, think about the “vibe” you want to create. Because this is a window scene, you are essentially working with two different environments: the Warm Interior and the Cool Exterior.
- The Cozy Warmth: For the girl’s sweater, the coffee mug, and the pastries, think about “harvest” colors. Deep mustards, burnt oranges, creamy beiges, and chocolate browns will make the indoor section feel inviting.
- The Rainy Gloom: For the view outside the window, stick to “recessive” colors. Muted teals, slate greys, and soft lavenders will create the illusion of distance and a wet atmosphere.
- The Pop of Life: The potted plants on the windowsill are your chance to add a splash of vibrant green. This reminds the viewer that even in the rain, life is blooming.
2. Mastering Textures
This specific illustration has three key textures that can really make your finished piece stand out:
- The Cable-Knit Sweater: The girl is wearing a chunky turtleneck. To make this look realistic, don’t just use one shade of color. Use a darker shade in the “valleys” of the knit lines and a lighter shade on the “peaks.” This adds three-dimensional depth.
- The Steam and the Rain: These are transparent elements. To color the rain, try using a very light silver or a pale “ice blue” colored pencil. For the steam rising from the heart-decorated mug, leave it mostly white, perhaps adding just a hint of soft yellow or peach at the edges to suggest the warmth of the beverage.
- The Flaky Pastries: Those croissants and cinnamon rolls on the table deserve some love! Use a “layering” technique. Start with a light tan base, add some golden-yellow highlights, and finish with a sharp cinnamon-brown for the crevices.
3. Advanced Lighting: The “Glow” Effect
Notice the string of bulb lights hanging across the window. This is a great chance to practice light source coloring.
- Color the center of the bulbs a very pale yellow or even leave them white.
- Lightly shade a “halo” of soft yellow around each bulb, overlapping the rain and the window frame.
- This creates a “glow” effect that makes the scene feel even more magical and festive.
The Psychological Benefits of Coloring
Beyond just creating a pretty picture, engaging with a page like this has genuine mental health benefits. In a fast-paced digital world, the tactile act of coloring helps:
- Induce a Meditative State: The repetitive motion of shading helps lower the heart rate and quiet “brain chatter.”
- Practice Mindfulness: You become hyper-aware of the pressure of your hand and the vibrancy of the pigment, grounding you in the present moment.
- Digital Detox: It’s an activity that requires zero screens, giving your eyes a much-needed break from blue light.
Creative Prompt: Tell a Story
As you color, imagine who this girl is. Is she waiting for a friend? Is she a writer working on her first novel? What kind of music is playing in this café? Maybe it’s soft jazz or the low hum of distant conversation. When we attach a story to our art, our color choices become more intentional.
Quick Coloring Tips for Beginners
- Start Light: You can always add more color, but it’s hard to take it away. Build your layers slowly.
- Check Your Paper: If you are using alcohol markers (like Copic or Ohuhu), make sure to put a “bleed sheet” behind your page so the ink doesn’t ruin the table underneath.
- Don’t Fear the White Space: You don’t have to color every single square millimeter. Leaving “white highlights” on the coffee mug or the girl’s hair can give the image a professional, polished look.